Artisan Développeur

Qualité, amélioration continue, agilité.

Pidgin for work and facebook messenger

I use pidgin for work to chat with my teammates, but I want to use it to talk sometimes with my wife without connecting to facebook, or facebook messenger nor activate the data/wifi on my phone.

I use to work with my phone offline, only in « phone mode ».

I use Ubuntu 19.04 at the time of this article.

First, I search all the pidgin related stuff with apt:

(sudo) apt-cache search pidgin

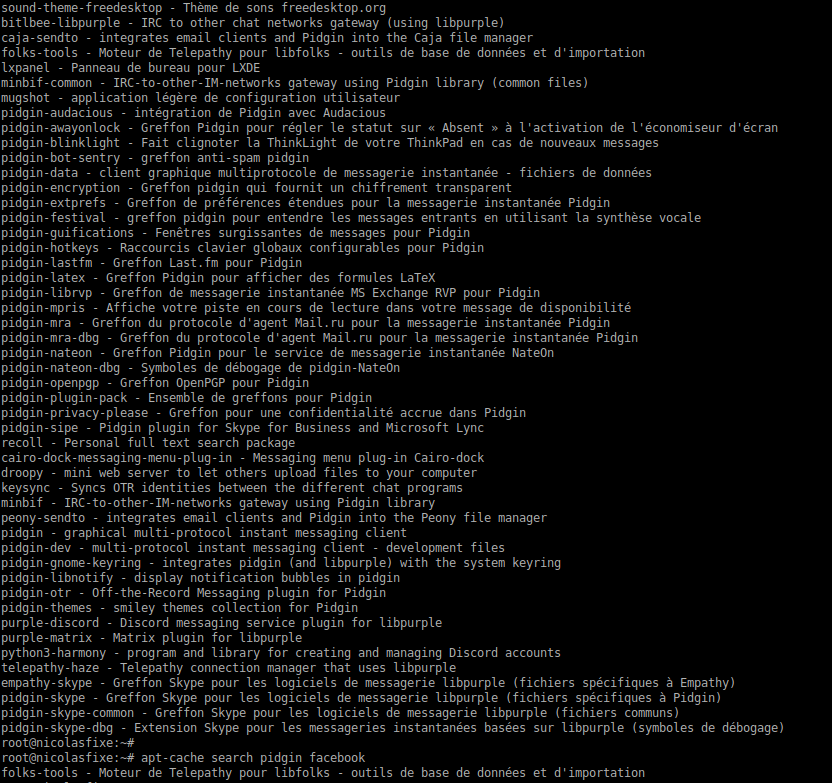
In the results I see some interesting things:

pidgin-guifications - Fenêtres surgissantes de messages pour Pidgin
pidgin-privacy-please - Greffon pour une confidentialité accrue dans Pidgin
pidgin-otr - Off-the-Record Messaging plugin for Pidgin
purple-discord - Discord messaging service plugin for libpurple

I install them, I will search for facebook later, discord is for testing, privacy-please and otr is for my paranoia and guifications is to be aware when a colleague of mine talk to me.

(sudo) apt install purple-discord pidgin-otr pidgin-privacy-please pidgin-guifications

Facebook messenger

For this one, we need libpurple-facebook, but ubuntu does not have any package for now.
So we just need to build it 🙂
https://github.com/dequis/purple-facebook/wiki/Building-on-*NIX

(sudo) apt install libglib2.0-dev libjson-glib-dev libjson-glib-1.0-0 libjson-glib-1.0-common libpurple-dev libpurple0 zlib1g-dev gir1.2-json-1.0 libdbus-glib-1-dev libdbus-glib-1-dev-bin

Ok will go for « Compiling -> From A Release Tarball »

Go to https://github.com/dequis/purple-facebook/releases
and choose the latest

# I prefer sudo -i and password than sudo every time
sudo -i
wget https://github.com/dequis/purple-facebook/releases/download/v0.9.6/purple-facebook-0.9.6.tar.gz
tar -xf purple-facebook-0.9.6.tar.gz
cd purple-facebook-0.9.6/
./configure
make
# install systemwide
make install

Restart pidgin after that, and go to the account creation:
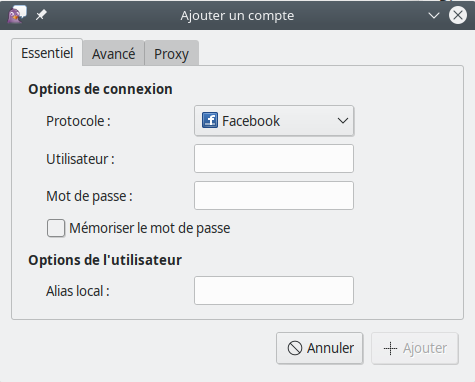
Facebook is here !

Do not forget to activate/configure the plugins you have installed.

Install open Jarvis on OSMC (raspbian 9.6)

Just for fun, I want to test openjarvis.

I have a Raspberry Pi with OSMC running my media center, and I use it often to try things, so this time is the turn of openjarvis.

But OSMC does not have all the needed package, and the how to install is old for openjarvis some of the package have changed.

I have not saved all my step, I think there are all here, but if you follow this and you have some issue, tell me in the comment.

Installation https://www.openjarvis.com/content/installation

sudo apt-get install -y git # install git if you don't have it already - needed with OSMC
git clone https://github.com/alexylem/jarvis.git
cd jarvis/
./jarvis.sh

To use snowboy without needed to build it for your system, you can do this dirty hack, it’s just for testing and fun, at your own risk 🙂

In the stt_engines/snowboy/main.sh file, you delete ligne 14 and 17 (you delete the IF condition on the debian_version)

Before:

elif [ "$jv_os_name" == "osmc" ]; then #628
            if [[ "$(cat /etc/debian_version)" -ge 8 ]]; then
                sb_supported_os=true
                binaries="rpi-arm-raspbian-8.0-1.1.0"
            fi

After:

elif [ "$jv_os_name" == "osmc" ]; then #628
            
                sb_supported_os=true
                binaries="rpi-arm-raspbian-8.0-1.1.0"

Before launching ./jarvis.sh you need to install alsa-utils, and libttspico-utils

sudo apt-get install alsa-utils libttspico-utils

If I have forget nothing, you can launch ./jarvis.sh and the installation will succeed 🙂

Mochajs locally in your symfony project

How to install node and mocha locally to unit test you javascript code

I will install packages in the require-dev section of my composer.json file, because in this case, I only use nodejs and mocha in the dev, preprod and test environments and they use the requierdev.
I don’t want to install that on my production environment.

To do that, I use two composer packages:

mouf/nodejs-installer

Packagist: https://packagist.org/packages/mouf/nodejs-installer
Github: https://github.com/thecodingmachine/nodejs-installer

koala-framework/composer-extra-assets

Packagist: https://packagist.org/packages/koala-framework/composer-extra-assets
Github: https://github.com/koala-framework/composer-extra-assets

Here the installation

You have to add this to composer.json file:

"require": {
    "mouf/nodejs-installer": "^1.0",
    "koala-framework/composer-extra-assets": "~1.1"
},
"extra": {
    "require-dev-npm": {
        "mocha": "*"
    }
}

To use mocha locally you have to add one file to the bin directory of your symfony project

In the script section, both in « post_install_cmd » and « post_update_cmd »

"touch bin/mocha && chmod +x bin/mocha && echo '#!/bin/bash \n DIR=$( cd \"$( dirname \"${BASH_SOURCE[0]}\" )\" && pwd ) \n export PATH=$DIR/../vendor/nodejs/nodejs//bin:$PATH \n ../node_modules/.bin/mocha \"$@\"' > bin/mocha"

Example:

],
    "scripts": {
        "post-root-package-install": [
            "SymfonyStandard\\Composer::hookRootPackageInstall"
        ],
        "post-install-cmd": [
            [...] //do not copy/paste, it's just an example !
            "Sensio\\Bundle\\DistributionBundle\\Composer\\ScriptHandler::removeSymfonyStandardFiles",
            "touch bin/mocha && chmod +x bin/mocha && echo '#!/bin/bash \n DIR=$( cd \"$( dirname \"${BASH_SOURCE[0]}\" )\" && pwd ) \n export PATH=$DIR/../vendor/nodejs/nodejs//bin:$PATH \n ../node_modules/.bin/mocha \"$@\"' > bin/mocha"
        ],
        "post-update-cmd": [
            [...]  //do not copy/paste, it's just an example !
            "Sensio\\Bundle\\DistributionBundle\\Composer\\ScriptHandler::removeSymfonyStandardFiles",
            "touch bin/mocha && chmod +x bin/mocha && echo '#!/bin/bash \n DIR=$( cd \"$( dirname \"${BASH_SOURCE[0]}\" )\" && pwd ) \n export PATH=$DIR/../vendor/nodejs/nodejs//bin:$PATH \n ../node_modules/.bin/mocha \"$@\"' > bin/mocha"
        ]
    },

This line will create the mocha file and set the execution permission.

To actually install these:

composer install

Create a js directory src/Tests

With you IDE, or

mkdir src/Tests/Js

Finally use it just like that

Run all tests files:

bin/mocha src/Tests/Js/*

Or specific one:

bin/mocha src/Tests/Js/file.js

That’s it ! You can now unit test easily your javascript code !

As always, if you have question,  better practice, suggestion comment !